potting mix for bonsai trees Buy Bonsai Soil Mix? ✓ Order before 16:30, shipped today – Sybotanica
SKU: 55939150315
potting mix for bonsai trees

potting mix for bonsai trees Buy Bonsai Soil Mix? ✓ Order before 16:30, shipped today – Sybotanica

Sale price$21.29 Regular price$23.65
Save 10%

Pay in installments of $5.91 with ShopPay, AfterPay and Klarna

Shipping Estimate
USA
  • USA
  • CAN

Ships within 48 hours · Estimated delivery Jul 1 - Jul 6

Promo Codes Available:

For Your Every Summer RSVP, with Code: SUMMER15

Description

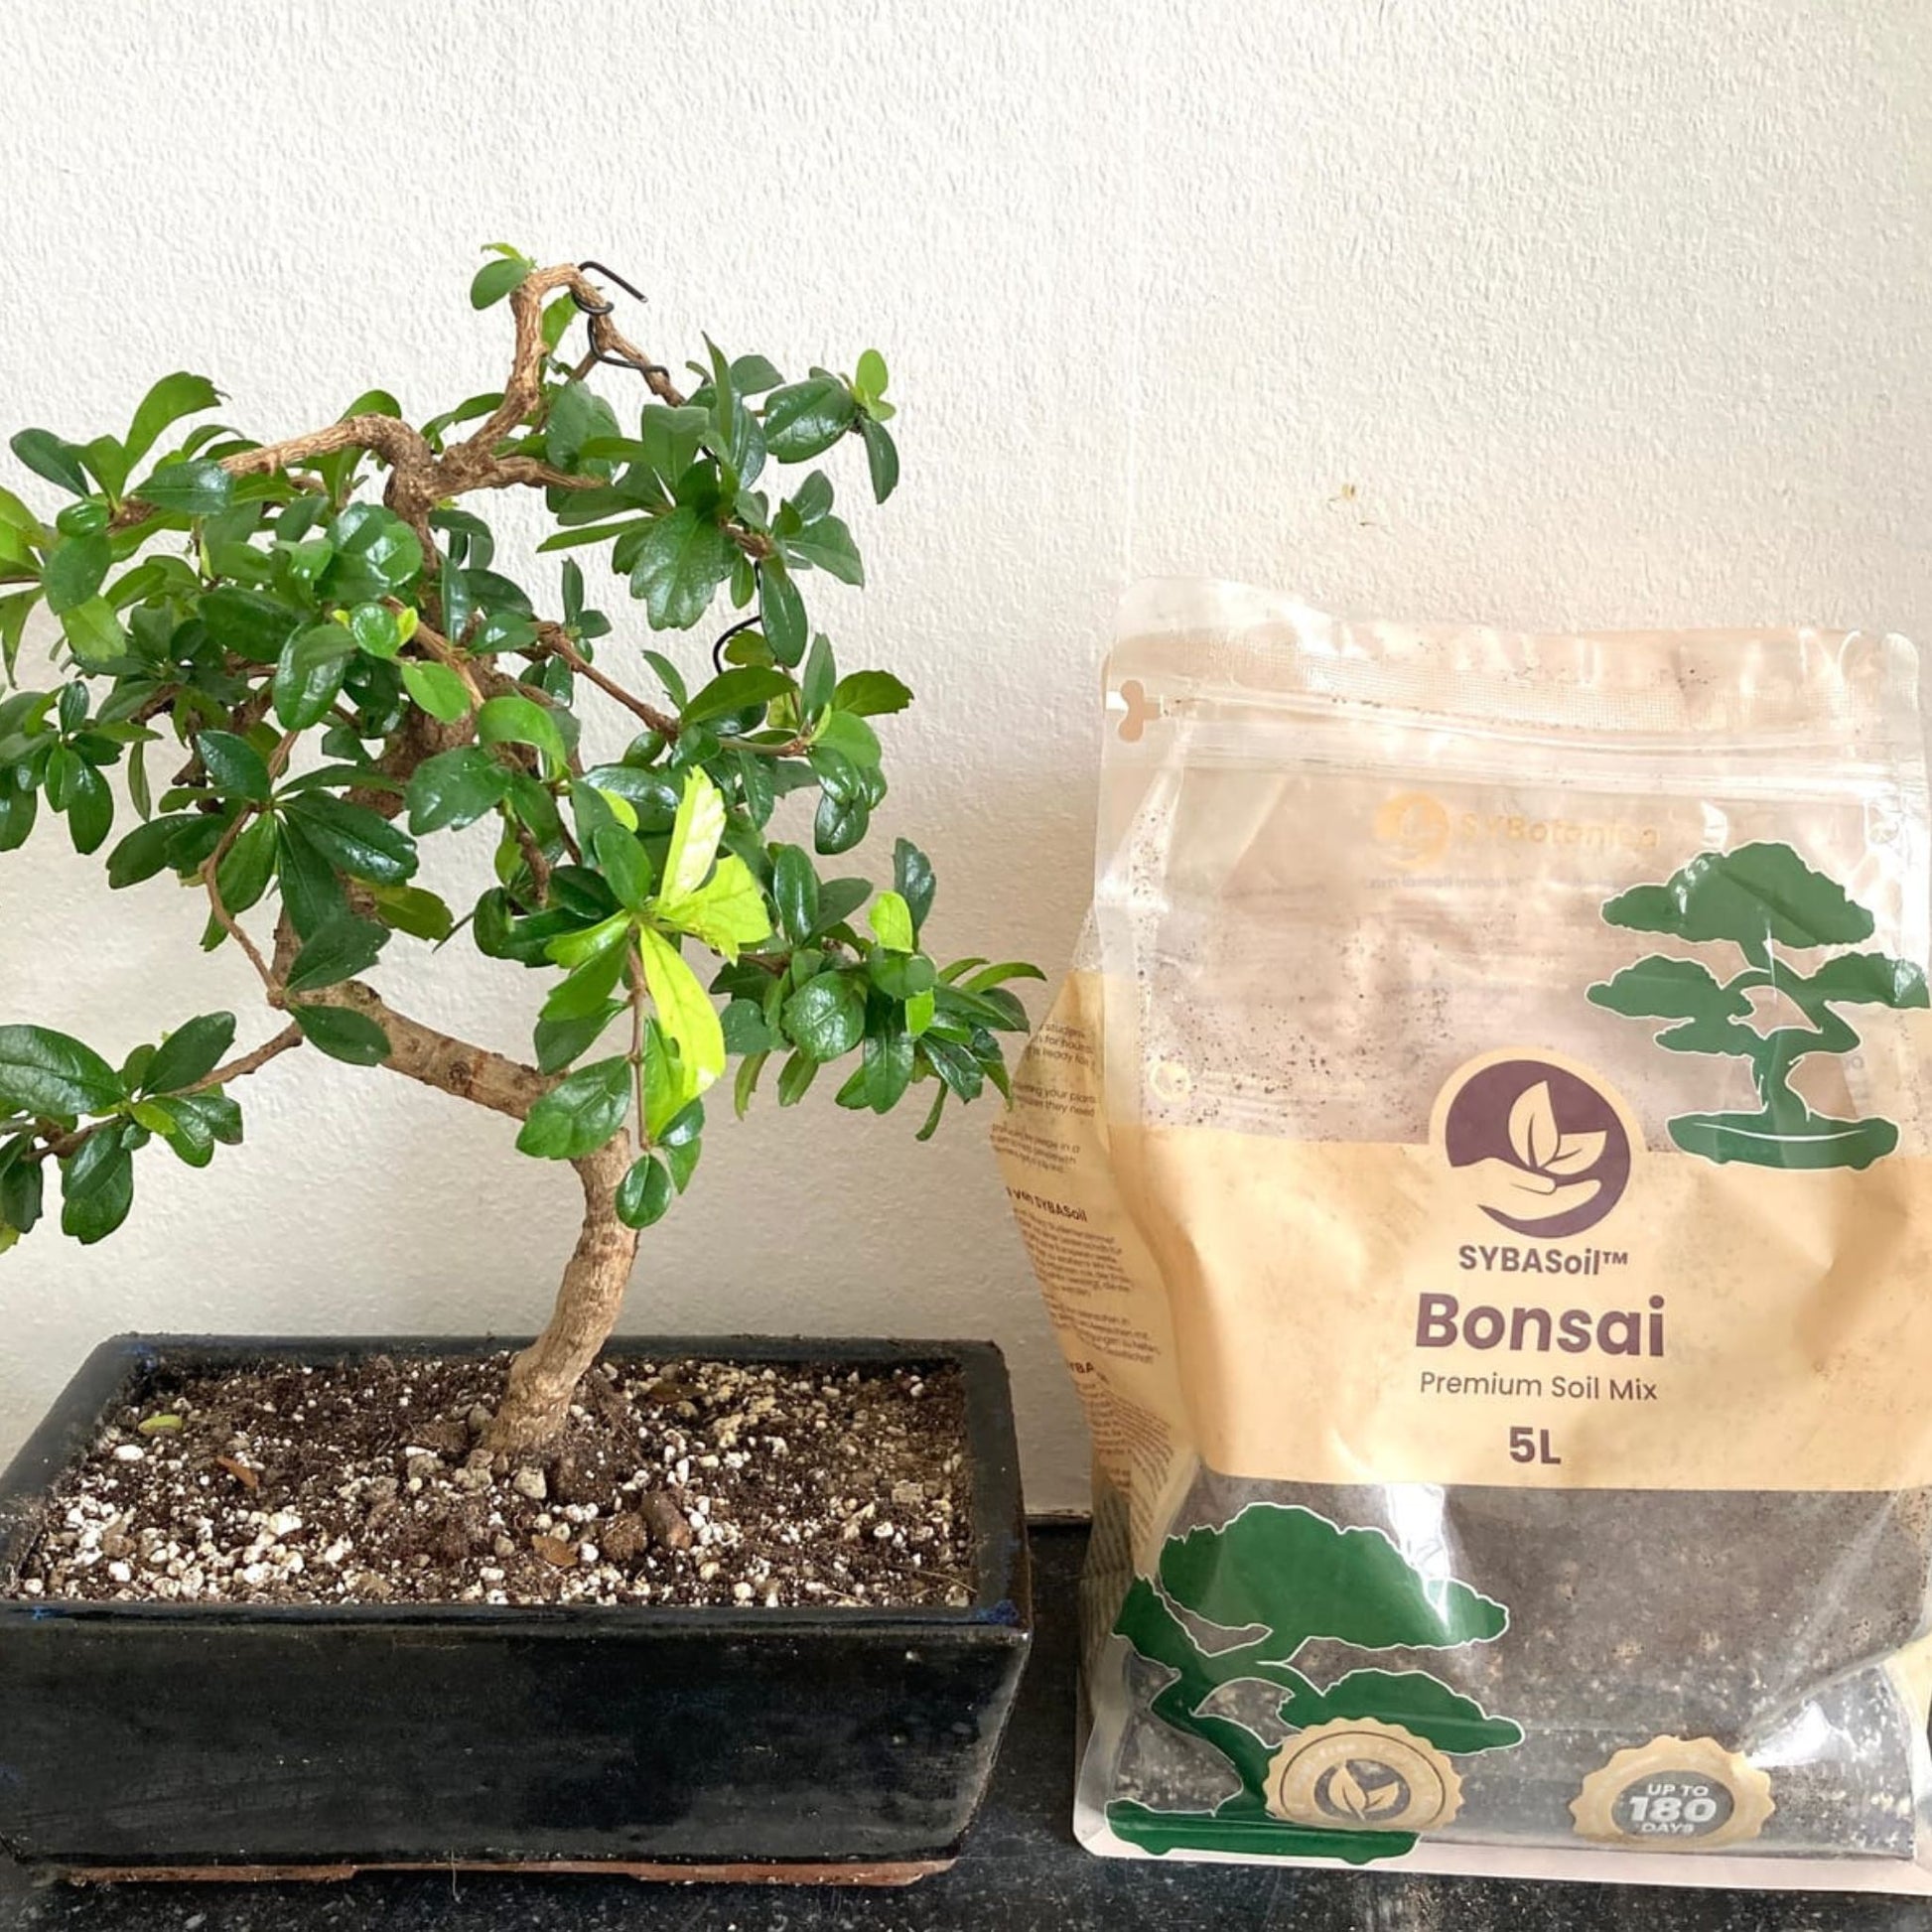
potting mix for bonsai trees Buy Bonsai Soil Mix? ✓ Order before 16:30, shipped today – SybotanicaThis SYBASoil mix can contain live worms! How to Use the Bonsai Soil Mix Using the mix is easy! start with removing as much of the old soil as possible. Gently squeeze the pot while holding it sideways to loosen up the plant. Run the roots under lukewarm tap water to remove the last pieces and bits. Also, make sure to remove any dead foliage that may still be on the plant using scissors. Now your plant is ready for its fresh Bonsai soil. Add a small

This SYBASoil mix can contain live worms!

How to Use the Bonsai Soil Mix

Using the mix is easy!  start with removing as much of the old soil as possible. Gently squeeze the pot while holding it sideways to loosen up the plant. Run the roots under lukewarm tap water to remove the last pieces and bits.

Also, make sure to remove any dead foliage that may still be on the plant using scissors. Now your plant is ready for its fresh Bonsai soil. Add a small layer of Bonsai mix at the bottom of the pot.

Place the plant in the pot, and slowly add Bonsai soil to the sides to fill it up. Make sure that the point where the roots meet the plant is just buried under the Bonsai soil.

Lightly pat the Bonsai mix down into the pot. Make sure to water the Bonsai mix thoroughly after repotting, as this helps settle the mix and roots down.

Why the Bonsai Mix Works

Bonsai are very delicate plants that need the best quality care available to thrive. The bonsai mix should not get hard when dry and have a good amount of aeration and drainage. The addition of pumice & perlite supplies this.

The lava rock helps with the structure of the roots and weighs them down, stopping your bonsai from getting top-heavy.

    The Original Habitat of the Bonsai Plants

    While bonsai don’t exactly come from nature, they do have a specific substrate requirement. This Japanese art form keeps the trees small, usually also in mini-containers compared to the large root system the plant develops in the wild. Gritty and quick-draining soil is key for the success of your bonsai. This Bonsai mix has it all!

    How to Care for Bonsai Plants

    Bonsai trees are more delicate than your average houseplant. Note that it is tree-specific, and we will only give you some basics to go by.

    Fertilising regularly during the growing season is a must, the root system & soil volume is small, so nutrients go quickly. To combat this, the Bonsai Mix has worm castings added in, which release nutrients slowly into the bonsai mix.

    For the perfect watering schedule, do some research on the type of tree you have. As for light requirements, bright indirect light is best for most, but again, do research on your specific tree.

      Shipping Notes
      • Free Standard Shipping on $100+ Orders to the USA.
      • Except Preorder products are shipped in 48 hours.
      • Delivery to the USA:
      1. Standard Shipping : 3-10 business days
      • If time is of the essence, please consider selecting expedited delivery for faster service.
      Exchange/Return Notes
      • We offer a 30-day return/exchange service after receiving.
      • Final sale items are not eligible for returns or exchanges.
      • To process your return/exchange, please contact us at [email protected]
      • Please click here for more details>>> Return & Exchange Policy
      SKU: 55939150315

      Discover Niche Categories That Outsell potting mix for bonsai trees

      Top-Converting Item to Boost Your Average Order

      4.0 ★★★★★
      Based on 2402 reviews
      Sort
      Highest Rating
      Newest First
      Oldest First
      Product Reviews
      K
      Verified Purchase
      karine
      Boise, US
      ★★★★★ 5
      Works
      Size: 3 Panel-102'', Color: Beige, Size: 3 Panel-102'', Color: Beige
      It’s beige and not white. Once install - hard to disinstall. Need a drill to put it together
      WAS THIS REVIEW HELPFUL?YesReportShare
      Reviewed in the United States on May 4, 2026
      R
      Verified Purchase
      ralversity
      Dallas, US
      ★★★★★ 3
      Does the job, but assembling by yourself is a nightmare
      Size: 4 Panel-88'', Color: Black
      Does it do the job? Yes, although as others said there are small gaps but it's not a huge deal. The price is also good. But the reason I'm giving it a 3/5 is simply because the assembly for this was a complete nightmare. I honestly don't think I would recommend this to anyone unless they have another person to help them assemble it, because doing it by myself was terrible. I don't think I'd buy this again, I think I'd opt to just spend a bit more money and save myself the trouble personally.
      WAS THIS REVIEW HELPFUL?YesReportShare
      Reviewed in the United States on May 29, 2026
      T
      Verified Purchase
      Talagand
      Louisville, US
      ★★★★★ 4
      Reasonably adequate room divider
      Size: 4 Panel-88'', Color: Beige
      I'm reviewing this as I assemble it. Couple things: 1. I didn't expect as much assembly. I've ordered dividers before and they more-or-less came as one unit. Sometimes the panels needed screwing together. These require complete assembly and come largely as three rods: two make up vertical columns and snap together. Another one (called part "C") makes the horizontal columns and you have two of these per panel (one attaches to part "A" and the other part "B"). These parts are metal with a plastic shim. Using the wood screws to attach to part "C" is a real pain in the neck. There's not much holding the panel in place so it's a little tricky. One tactic I've found while I'm assembling that works for the initial connections from parts A and B to their respective "C" rods is to hold the screw in place with a screw driver and then rotating the rod around the screw. This will do a number on your hands if you aren't wearing gloves. This obviously doesn't work when completing the connection. Using a driller driver on this is really near impossible because there isn't anything you can use to secure it in place. You can use it on the first panel, but as it gets longer, it becomes increasingly difficult and because it isn't wood, it's really tight. I considered drilling larger pilot holes but since there are only 4x4=16 screws I need to screw in, I just decided to use my screw driver to complete it. 2. Also related to assembly. When completing the panels (attaching parts "A" and "B" to parts "C" that have the cloth cover on it), you have to be careful that when you tighten that side that it isn't loosening the other side. Because the pilot holes are so tight, you can end up rotating the rod, which rotates it in the same direction as looser on the original side. Having someone hold the "C" rod in place while you screw it in is probably the easiest approach. I didn't have a 2nd person, so I just had to keep flipping back and forth and tightening both sides as I screwed it in. Not the worlds biggest deal, but annoying nonetheless. 3. The way the instructions are written, they seem to suggest building this thing progressively; that is, you do panel 1, then 2, connect them together, then do 3 and connect it, etc. I took a different route that I suspect saved me quite a bit of trouble, and I assembled all four panels first and THEN connected everything together. 4. For the love of God make sure you check that the plastic tip is on the same side for every panel. Otherwise, you have to take one side apart again and reverse it. On the bright side, if this happens, you've essentially bored out the pilot holes to be the correct size... which is having me question if I shouldn't have just bored them out to the appropriate width in the first place. 5. Attaching all of the panels together is also an enormous pain in the ass unless you happen to have an 88" long elevated surface. Attaching the legs either requires you to elevate one side, which will invariably twist the inexplicably cheap material in the bottom connectors... or you can attach them sideways... or you can put this thing upright, having two people hold the panels in place while you use the allen wrench to tighten the bolts on the underside. None of those are particularly great options. NOW on to the utility itself. 1. The panels do let some light through (I didn't believe their advertising, and that was one of the reasons that I bought beige, is that I wanted it to not be too dark). They aren't transparent though, so it isn't that far off from their description. They functionally work great, and keep the mess of wires hidden and when I'm sitting at my desk, actually reflect quite a bit of light into my office. Great! 2. My wife has described these as "the most hideous piece of furniture ever conceived of by man." So it does not have spouse approval factor. Granted, she will seldom be in my office area, so that isn't the end of the world. 3. These are really hard to align in a way that doesn't look a little tacky. There are some plastic connectors but they don't do a bang up job of keeping these in place. Each panel is slightly tilted and it's... quite obvious. I may at some point make my own improvements to these to help make them more level. It's not a particularly expensive product so I wasn't expecting much so it's fine and I'm not going to ding them on the rating because of it. All said, would I buy this product again? Probably not. It's assembly was ~90 minutes which is about 75 minutes longer than I was anticipating spending on this (not including the 5 minute writeup that I'm doing here). But am I going to return it? Also no, if for no other reason I'd be just as annoyed taking it apart and putting it in the original box to return it.
      WAS THIS REVIEW HELPFUL?YesReportShare
      Reviewed in the United States on October 31, 2023
      M
      Verified Purchase
      Mariah
      Pawtucket, US
      ★★★★★ 5
      Beautiful shelves!
      Size: 48 Inch, Color: Natural, Size: 48 Inch, Color: Natural
      Since new build homes typically don't come with towel rods this was what I envisioned instead. I purchased the hooks separately. The shelves are perfect! I ordered a 36in set as you see with the cream towels and a 48in set that you see with the green towels. They're not loose but not 100% sturdy. I recommend maybe gluing to the wall in addition to the rest and definitely screwing into a stud. They're easy enough to figure out without the instructions. But I will say they're supposed to be screwed in underneath to the rods but they did not come with an appropriate screw for that so I had to use some I already had on hand.
      WAS THIS REVIEW HELPFUL?YesReportShare
      Reviewed in the United States on May 20, 2025
      Verified Purchase
      2089991211
      Lexington, US
      ★★★★★ 5
      Nice
      Size: 30 Inch, Color: Natural, Size: 30 Inch, Color: Natural
      Easy to install..comes with small magnetic leveler which made things even easier! Really nice for the price. Only thing is other than sliding the wood onto the metal brace, there’s only 2 screws that screw wood onto brace so it makes for a slightly wobbly shelf on the brace… although I have 6 screws/anchors holding each brace into the wall so it’s technically quite solid…I’m a bit nervous to keep delicates on the shelves
      WAS THIS REVIEW HELPFUL?YesReportShare
      Reviewed in the United States on February 16, 2025

      recommand products